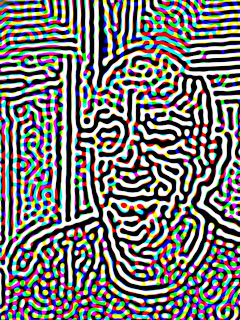
 One reader, Stefan Wolfrum showed me how repeated sharpening and blurring can create annealing-like patterns, and I must say that I have done this before but I found it to be quite slow. This is also true with reaction-diffusion, which can require thousands of iterations to produce a result.
So I tried it again and I found that it was a very time-consuming process. Here is the process applied to a low-resolution image of me.
I had to repeat the process (which I implemented as a Painter script) maybe 50 times before all the areas of the image were sufficiently patterned.
When I tried it on a larger image, I realized that this was a very ambitious undertaking indeed!
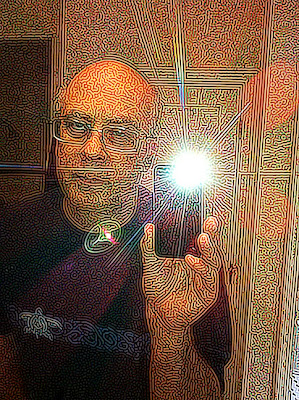
I can take a picture in a mirror with an iPhone (with flash) and it creates interesting lens flares and striations.
 Here is the process applied to a much larger image. To complete this one took many hundreds of iterations, at the very least.
I took the result and composited the original image over it using Hard Light to make it more obvious what the image is.
You can see the Hawaiian honu (sea turtle) that is on my T-shirt appears in interesting detail. My hand appears to be rendered in fingerprint style.
The flash produces striations that are rendered in multiple lines.
And there are altogether too many wrinkles in my face!
Notice also the oval lens flare made it into the image. Anything with a form in the image ends up getting rendered in parallel lines and windings.
So, thanks Stefan! I like this method of annealing, but it does appear to be extremely time-consuming.
Here is an example of quick annealing in Texture. I render a pattern using an image-in-cells texture and then filter it repeatedly. Then I anneal it to make it hard-edged. Then I return it to the FFT window and continue to filter it.
The more it gets filtered, the more regular the lines. In this case, the filter is anisotropic.
Once filtered a few times over (maybe four times) the image becomes the very regular fingerprint-like image you see to the right.
The next step if to take this image back to the texture window and apply annealing to it. I adjust the anneal to create about 50% white and 50% black.
 Here, to left, you see the annealed version of the same exact image.
But, you may ask yourself, how do I get the lines to follow he directions in an image? This would be done using direction analysis. The usual technique is to use Gabor filters (good luck implementing them).
You can also simply load up a vector field of the directions and use that vector field to process your spotty noise texture. Anneal in-between the direction-field blur steps.
And you can get images like these, but where the lines follow an image. However, the direction field is generally limited to the edges of the image, so you will have to infill the directions using some kind of iteration.
 For me, the next thing is to process he annealed texture into a kind of rendering of a sand dune field.
You can see this to the right here. To get this, I used another kind o anisotropic filter that repeats all wavelengths but filters out some directions from the frequency domain image.
This image is quite good looking as sand-dune images go.
This technique can work, I think, on any anisotropic image.
By the way, isotropic means without a prevailing direction, so anisotropic means with some prevailing directions. So a knitted pattern will have the direction of the knitted rows as its prevailing direction. Fabric might have two prevailing directions.
 If you anneal an image that is filtered at a smaller wavelength (higher frequency) you get finer patterns.
Here (to left) is an example of inner patterns.
This technique can be used at larger scales without difficulty.
I wanted to show you a slightly closer look at the dunes rendering. So I did another. I find the lines between the successive wrinkles to be very convincing visually. Even the slight shadings that happen when a fork occurs are nice. With all the shadings, it appears to be quite reasonable as a 3D depiction.
As time goes on, the trick will be to get he striations to follow the lines of another image. And to do it efficiently, a better technique will have to be created.
I do have techniques for extracting directions from images. I think a technique that allows the directions to infill areas that are generally flat will be required as well, in order to get something as cool as sharpen-blur annealing. And be efficient, of course.


No comments:
Post a Comment